Saturday, February 12, 2011

A Quick Project

Hello Everyone,

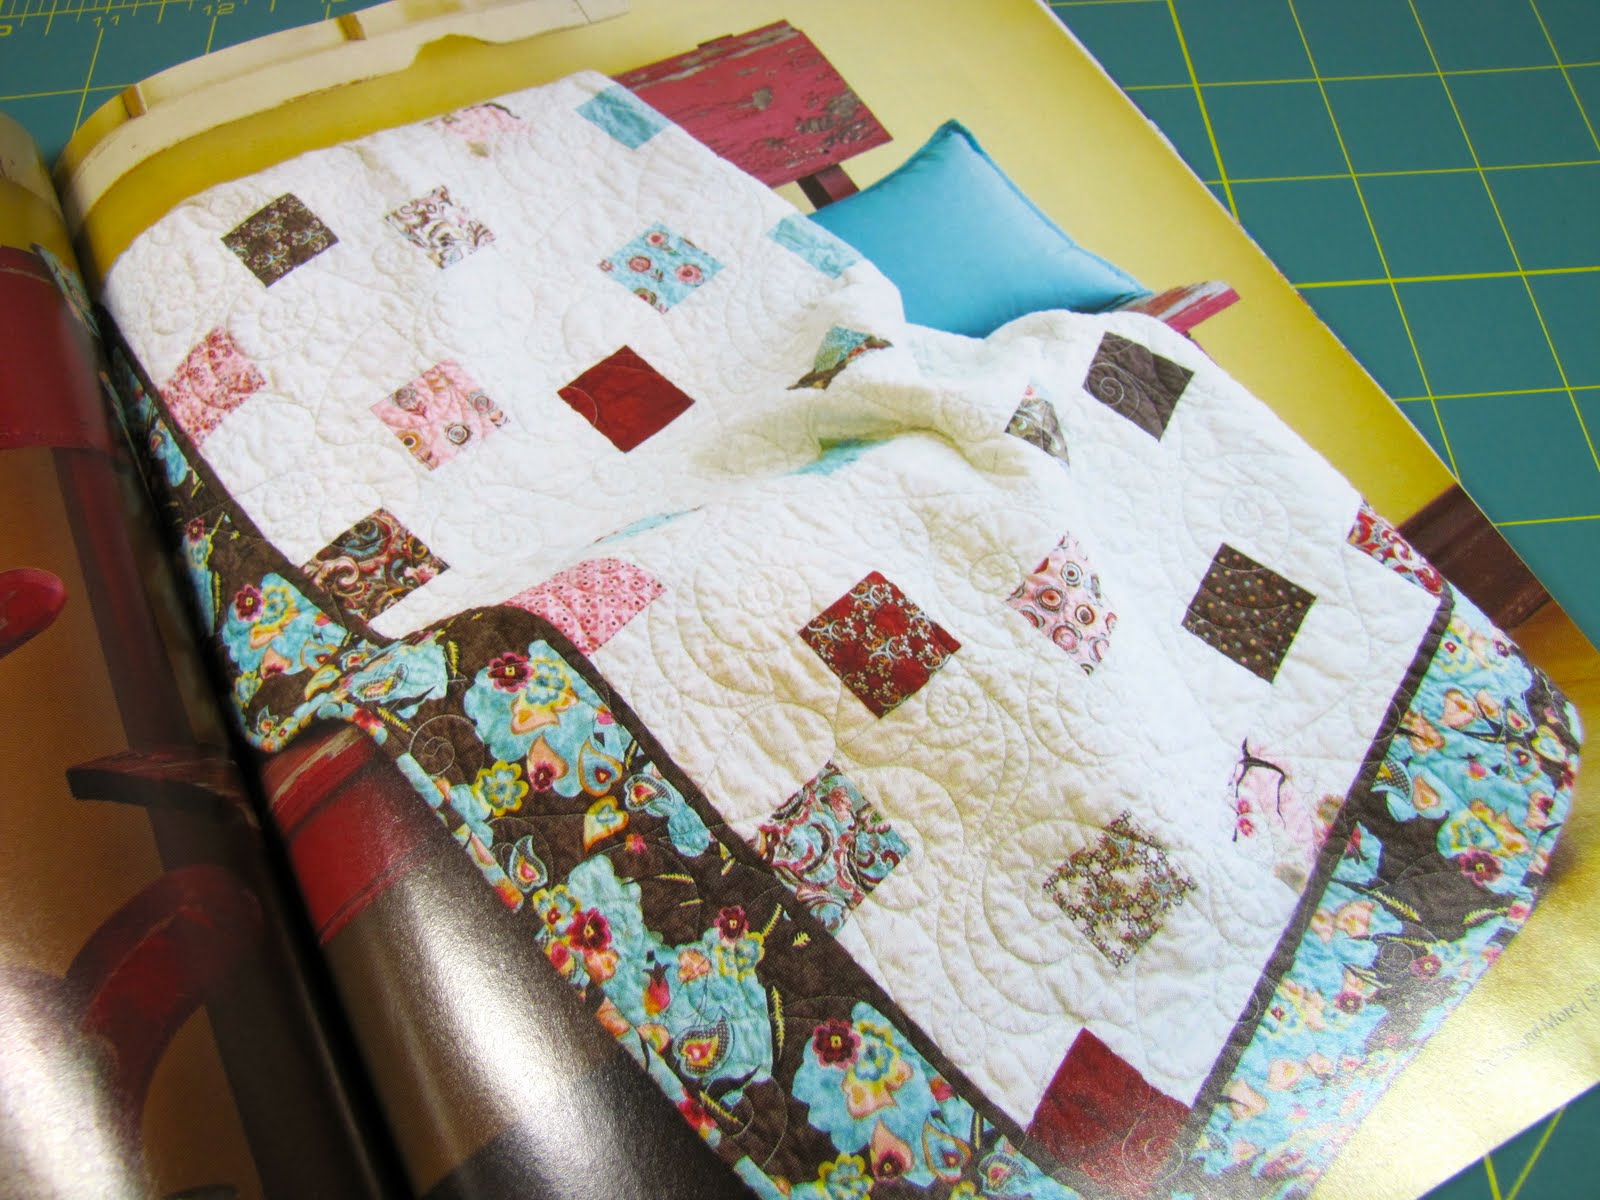
This project that I am showcasing today is a great quick and easy one to piece and give as a gift or just snuggle up under. It is special to me for several reasons.

First, it is designed and made by my blogging friend Vickie of Spun Sugar Quilts.


The quilt is called Spanish Tiles and is a simple design that would please any quilter, beginner or otherwise!

The fabrics that she chose were Moda Basic Grey Blush. Perfect romantic feel for Valentine's Day.

The neat thing is that you can see it in...


the newest issue of Quilts and More! They are hot off the press. So make sure you get yours. There are lots of other great projects in there too.

But what makes this extra special for me, is that I actually saw this quilt in person because...


Yes, that is right, I quilted it for Vickie!! I know, Quilts and More, misspelled my last name. That is okay, it seems to happen a lot.

So make sure you pop on over to Vickie's to see her post about it, she goes into a little more detail about the quilt. Tell her I said hello!

Thanks, Vickie for giving me the opportunity to work on your quilt!


Until Next Time...

Share/Bookmark

Thursday, February 10, 2011

Cool Caribbean Color

Hello Everyone,

I am not sure what it is, all the snow, the cold icy roads, the icicles hanging off of our roof, but I have been thinking warmth. Sometimes when I think warmth, my mind wanders to the beautiful waters found in the Caribbean. Right now a trip to the Caribbean is very appealing!!

But since I know that is not happening, I decided when I was at Victoria's this past weekend to buy more silks (surprise, surprise), but in a Caribbean water palette. Maybe by making a quilt with these colors, it will take me there in my minds eye.

So here is what I purchased...


Beautiful teal blues, greens, and light blues. Most of you know that I am not a blue fan, but if there is a little yellow or green in the blue and the color is completely saturated, then I am there!!


Plus if they are luscious silk dupioni's, it makes them all worth it!! The only one in the photo that may not be in the final palette is the silk in the very foreground. It has too much purple in it, I think.


Here is the whole bunch of silks together. Aren't they just glorious?

So of course, I couldn't let Victoria have all the fun with the African fabric.


So I needed to add some to my African stash. Yes, my stash is extensive, but you all understand how we have the need to add new and exciting fabrics to our stashes, right?

See the little bundle at the top of the photo, Victoria gave those to me as a little welcoming present. Thanks, V!!


But, I must say that of everything that I purchased over the weekend, this black African Brocade was the one that I was most excited about. I have been looking for this for literally years now and I found it finally!! This will be going into a special African quilt for my husband. This is the year that his quilt will be made!!

So there you have it, the results of our NYC shopping trip!

***20% off my entire online store through 2/11. Use the code party20 at checkout for your discount***


Until Next Time...

Share/Bookmark

Tuesday, February 8, 2011

Fun=NYC+Victoria

Hello Everyone,

I had a fantastic weekend... courtesy of Victoria! A while back she had asked me to come to NYC to stay with her for the weekend. Some sew time, girl time, and shopping. For many of you who don't know me, I am not much of a city girl and I normally wouldn't travel into the city on my own. But with a little coaxing and a lot of courage, I landed in Grand Central Station and met with Victoria.

On Saturday her NYC Metro Mod Quilt Guild met in her place. What a fun bunch!! TONS of inspiration to be had.


They were very welcoming!! Love the quilt by David. The suggestion for the backing was Bye, Bye, Bye, bye!


The guild makes group quilts. Everyone submits a block or two. A theme is chosen and a quilt is made. The above is the cheddar quilt.


This one is the circular or curve quilt. Great and how much fun!!

After the guild meeting Victoria and I had some shopping time. More on that in my next post. But we worked on some projects too!


Here Victoria is pondering her African quilt. Of course she was making it King Size. It was whipping up quick. I am sure that she has it complete and quilted by now, right?


I worked on a Judy Niemeyer pattern... Seasonal Table Runner. Love the points and the batiks!!


Victoria planning her border for her African quilt. It is going to be a beauty!


All in all a great weekend! Thank you Victoria for the invite! I look forward to doing this again in the future. Yes, you heard it right... again!!

Stay tuned to see our haul from our NYC shopping!

Until Next Time...


***20% off my entire online store through 2/11. Use the code party20 at checkout for your discount***

Share/Bookmark

Monday, February 7, 2011

BIG Art Gallery Fabric Winner

Hello Everyone,

First, my apologies for getting the winners picked so late. But I really have a great excuse... I was visiting Victoria for a great girls weekend. (More about that later)

Thank you to all who entered the giveaway. I know that the winners will love the fabric. Remember, if you didn't win, you can still find Art Gallery fabric in my shop!! Just click here.


So we had 2 winners. The first winner will receive the above... Art Gallery Pure Elements.


The second winner will receive the above... Paradise fabric.

Now for the winners... drumroll please...


Do you believe these numbers? Wow, just 2 apart!!

The lucky winners are:

Delores from Canada, wins Pure Elements!

and

Deb of Deb's Doodlings, wins Paradise!!

Congratulations Ladies!
I have sent you each private e-mails, just respond with and the fabric will be sent out to you.

Stay tuned for highlights of my weekend at Victoria's!

***20% off my entire online store through 2/11. Use the code party20 at checkout for your discount***


Until Next Time...

Share/Bookmark

Thursday, February 3, 2011

Brrrrr.... Baby It's Cold Outside!

Hello Everyone,

As many of you know, much of the U.S. has been hit hard this year with wicked snow storms. Our little corner of the states, has been no exception. We have had record snowfall this year and boy could I use a little dose of spring!

Here is what I see out of my studio window.


Yes, BIG, really BIG icicles all over our house. In fact, all over everyone's houses. We keep knocking them off, but they reform. We also awoke one morning to a leaky roof.


Here is a little dose of how big the snow piles are. This is how we have to shovel now... high! There is no where to put it anymore.


This is the entry to our mudroom area. We no longer shovel to the front door. As you can see way too much snow and it is heavy.


I had to open the front door just to show you that the snow is up and covering our front steps. If we were to walk out, it would be up past our thighs!!

Funny thing though, I saw two robins yesterday. Hmmm... aren't they typically a sign of spring?

Until Next Time...


***Tomorrow is the last day for the Westminster Fabric sale! Only $7.15 per yard. Just click here to get started.

Share/Bookmark

Tuesday, February 1, 2011

My Very First

Hello Everyone,

I thought that it would be kind of fun to show you around my very first patchwork project that I made waaaaay back in 6th grade Home Economics. Now it isn't even called that, it is called Family and Consumer Sciences (FACS).

So come take the tour with me, all the way back to my younger days! (Much younger)


Here it is in all it's faded glory! My first patchwork pillow. Not bad for my 1st attempt. Color selection was good. Although, I think the fabric is a poly/cotton blend. Not sure that I had too much of a choice back then. So I probably chose what appealed to me.


You can even see that I did a pretty decent job of matching points.


And then also mixed that in with a not so decent job of matching points.


The pillow was stuffed with, I think, a poly fiber fill. Not sure why, but we didn't use a pillow form. Maybe lack of availability or price.


The back was just simple plain solid.


You can see where I stitched it closed, as we did not do an envelope style back.

A couple of things that really amaze me about this project:
1. That I still actually have it!
2. That I did a pretty decent job, at least I think so.
3. It really drove home the memory of learning to sew garments. I so enjoyed doing that in Home Economics and made tons!!
4. It also gave me a comforting kind of feeling, knowing that I have always enjoyed sewing in all its forms.

Do you still have your very first sewing/quilting project?
If you do, I would love to see it!! Or at least hear about it and what memories it brings back for you. I have enjoyed sharing mine.

Before you leave don't forget to enter my big fabric GIVEAWAY on this post, by clicking here.

Until Next Time...

***All Westminster Fabrics are marked down to $7.15 per yard through 2/4. Just click here to begin shopping.***

Share/Bookmark

Sunday, January 30, 2011

Lil' Twister Tutorial

Hello Everyone,

As promised, I wanted to show you how to use the Lil' Twister Template to make the tessellating pinwheels. I hope you enjoy and will give this a try.


First start with your selection of fabrics. I chose silk dupioni. If you use silks, I highly recommend that you back them with a very lightweight fusible interfacing. It helps to prevent fraying and any distortion by stabilizing the fabric.


Then you will cut your fabric into 5" squares (perfect for the pre-cut charm packs) and arrange them in a pleasing manner. I arranged them in a 6 X 4 layout. You can choose less or more if you like, but the size of your finished project will either be smaller or larger.


Then sew all the blocks together in rows and then join the rows.


Now you will add a 3" inch border to all 4 sides. It looks pretty like this, but will look even prettier when complete.


Now you will take your Lil' Twister template tool by CS Designs, (it can be found here in my shop) and align the black lines on the template on the seam lines as shown above.

You should start in the top left corner of your bordered blocks. You will have some of the border and some of the block in the first square. Cut around the template for your first block. Then move to the next seam to the right and so on until you get to the end, then move to the next row.


As you go from seam to seam it is important to keep your blocks in order to make each pinwheel block, as shown above.


Once you are done, you will have something that looks like this above. They now need to be sewn together by rows and then join the rows together.


Your original piece will look like Swiss Cheese (see above). Now all those little squares that you see, cut them into 1.75" squares for the outside border. You will need more from your scraps, so definitely cut more 1.75" squares.


Now that you have joined the blocks, your piece will look like the above, no border. You can stop here or you can now get creative.


I chose to add another 3.5 inch border of black.


Then to the black border I added the 1.75" squares and all the extras to form the outer border. You can really get creative here, maybe a wonky border, flying geese, longer piano keys, the sky is the limit.

Finished size 24 X 30

This is what your final piece will look like if you do what I did. If you do something else, I would love to see your version.

The Lil' Twister is so much fun! There is also a bigger template for use with the 10" Layer cake pre-cuts as well. Currently, I only stock the smaller version. Click here for yours!

I hope you have fun with this, please send me your photos.

Don't forget to enter the fabric GIVEAWAY on this post!!

Oh, and by the way, ALL Westminster Fabrics are marked down to $7.15 per yard through 2/4/11. Find them by clicking here.

Until Next Time...


Share/Bookmark
Related Posts Plugin for WordPress, Blogger...