
Hello Everyone,
On Thursday before my good friend Victoria Findlay Wolfe arrived, I wanted to make her a little gift. Actually, I have been wanting to make this for a while and I finally got around to it. What I was envisioning was playing with some of the beautiful ribbons that we carry from Renaissance.
Making sort of a crazy quilt and quilting it as I go. Here is my process (tutorial)...

First I chose a top fabric and cut it approximately 9.5 inches square. I cut a piece of batting slightly larger. Also, choose a backing fabric and cut it larger than the top and the batting facing it wrong sides to the batting and top.
I put 5 pins into it to baste it.

Then I began placing pieces of ribbon on and sewing them down on the very edge with a complimentary thread through all the layers.

Then continue to add ribbons going "around" sewing in the same manner.

Along the way, you cut the ribbon to whatever size you need.

These are the ribbons that I was working with for this project.
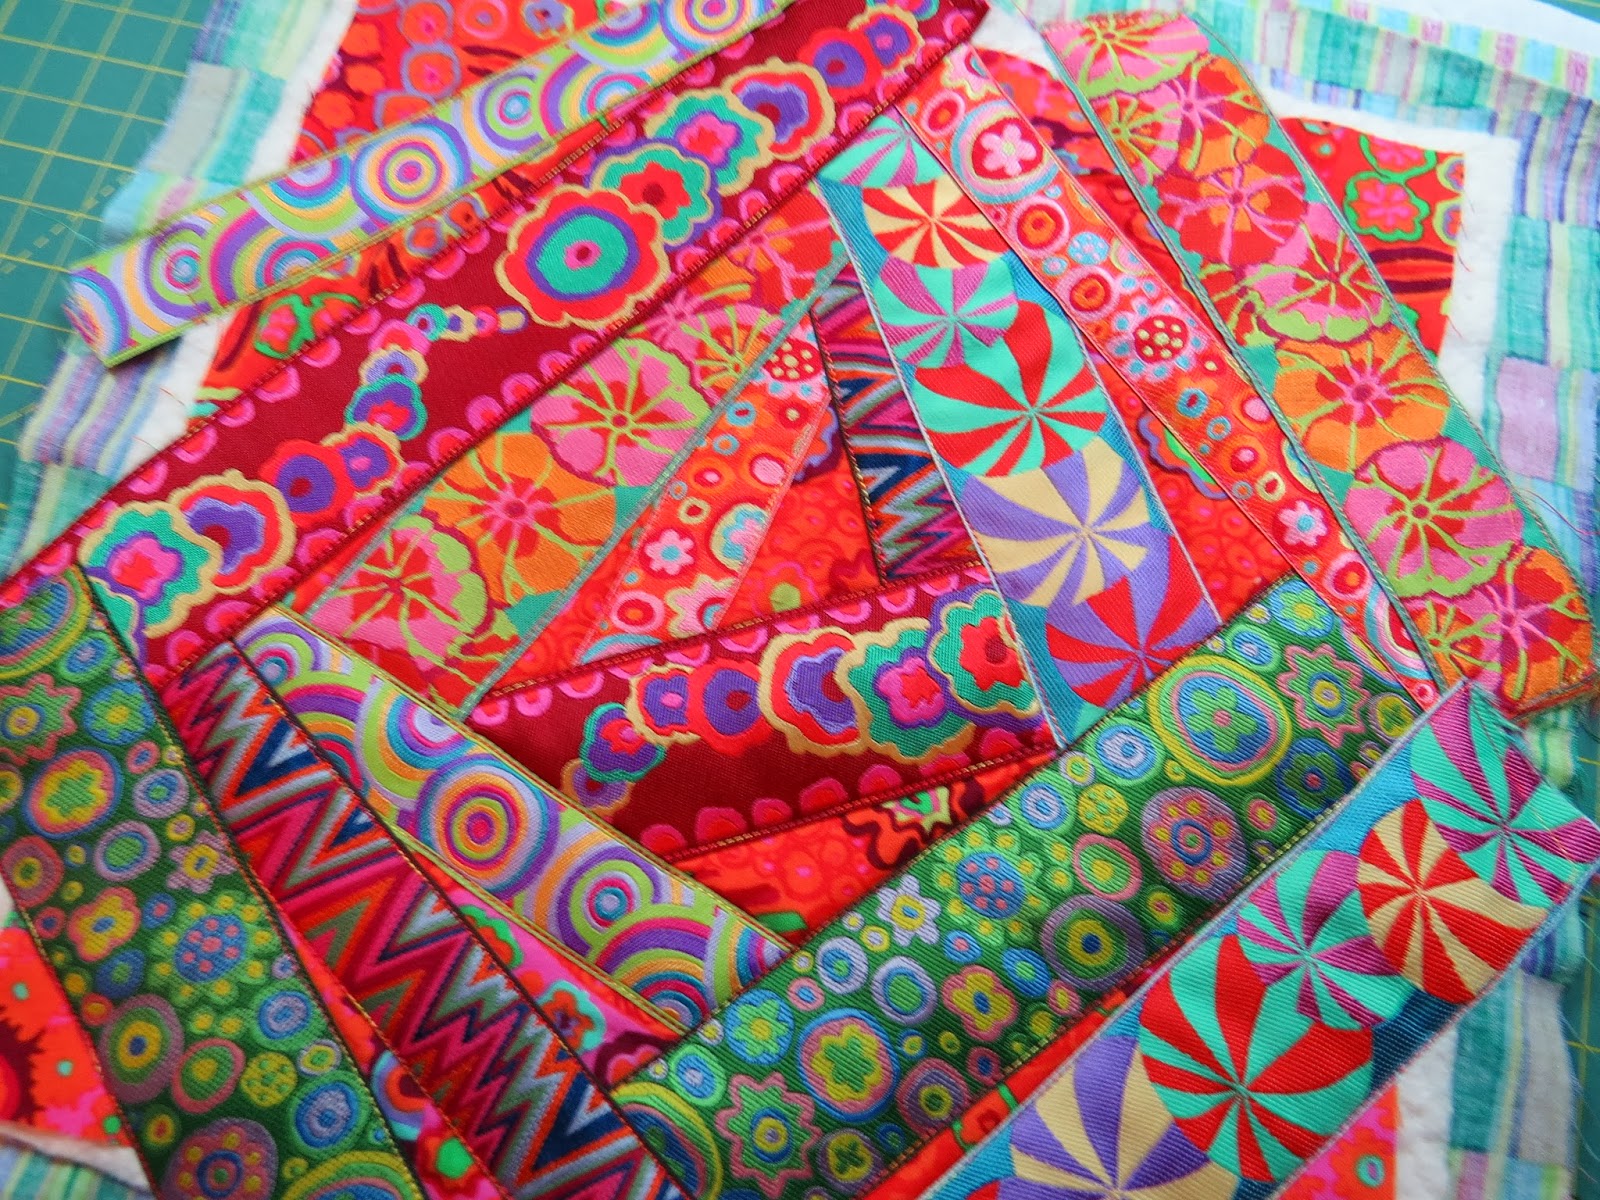
Here is what it looks like before you trim it down and have added all the ribbon.

Now trim it down to the size you desire.

Here is what the back looks like when done.

Love the look of this crazy piece. Now all you need to do is add the binding.

I chose green to compliment all the red.

Then gave this little beauty to Victoria. She loved it and said she would be hanging it in her studio.
The great thing is that it took less than an hour to make and is a cute little mini. I will be making another as it was sooooo much fun.
If you want to make one, just click here to see all the NEW ribbons that we have in stock.
If you make one send me a photo! I would love to see it.
Until Next Time...


5 comments:
Love Kaffe's ribbon. And a perfect match for Victoria.
Very fun and very festive!
I love this idea. It will mean an new thing to collect - ribbon!
Georgeous! Such great colours.
That is just stunning! And so easy! Yes! now we can collect ribbon!
Post a Comment