Tuesday, November 30, 2010

There Is A Pile!

Hello Everyone,

So sorry, this post was intended for yesterday, but we were without internet! It is really amazing how much we depend on technology isn't it?

Anyway, so this past weekend I did some sewing and worked on my daughter's Hunter's Star Quilt as shown in this post. I was able to put on the two inner borders and also work on the 3rd border which is pieced.


The result was these combo units. Black and white with a touch of teal and blue, just like she wanted.


I started with 3 piles of squares. One black, one white, and one with blues and teals. Very saturated in color. She picked out the colors. Many of them are batiks. Even though she picked out the colors she still doesn't know what the quilt looks like. Now to keep it that way.


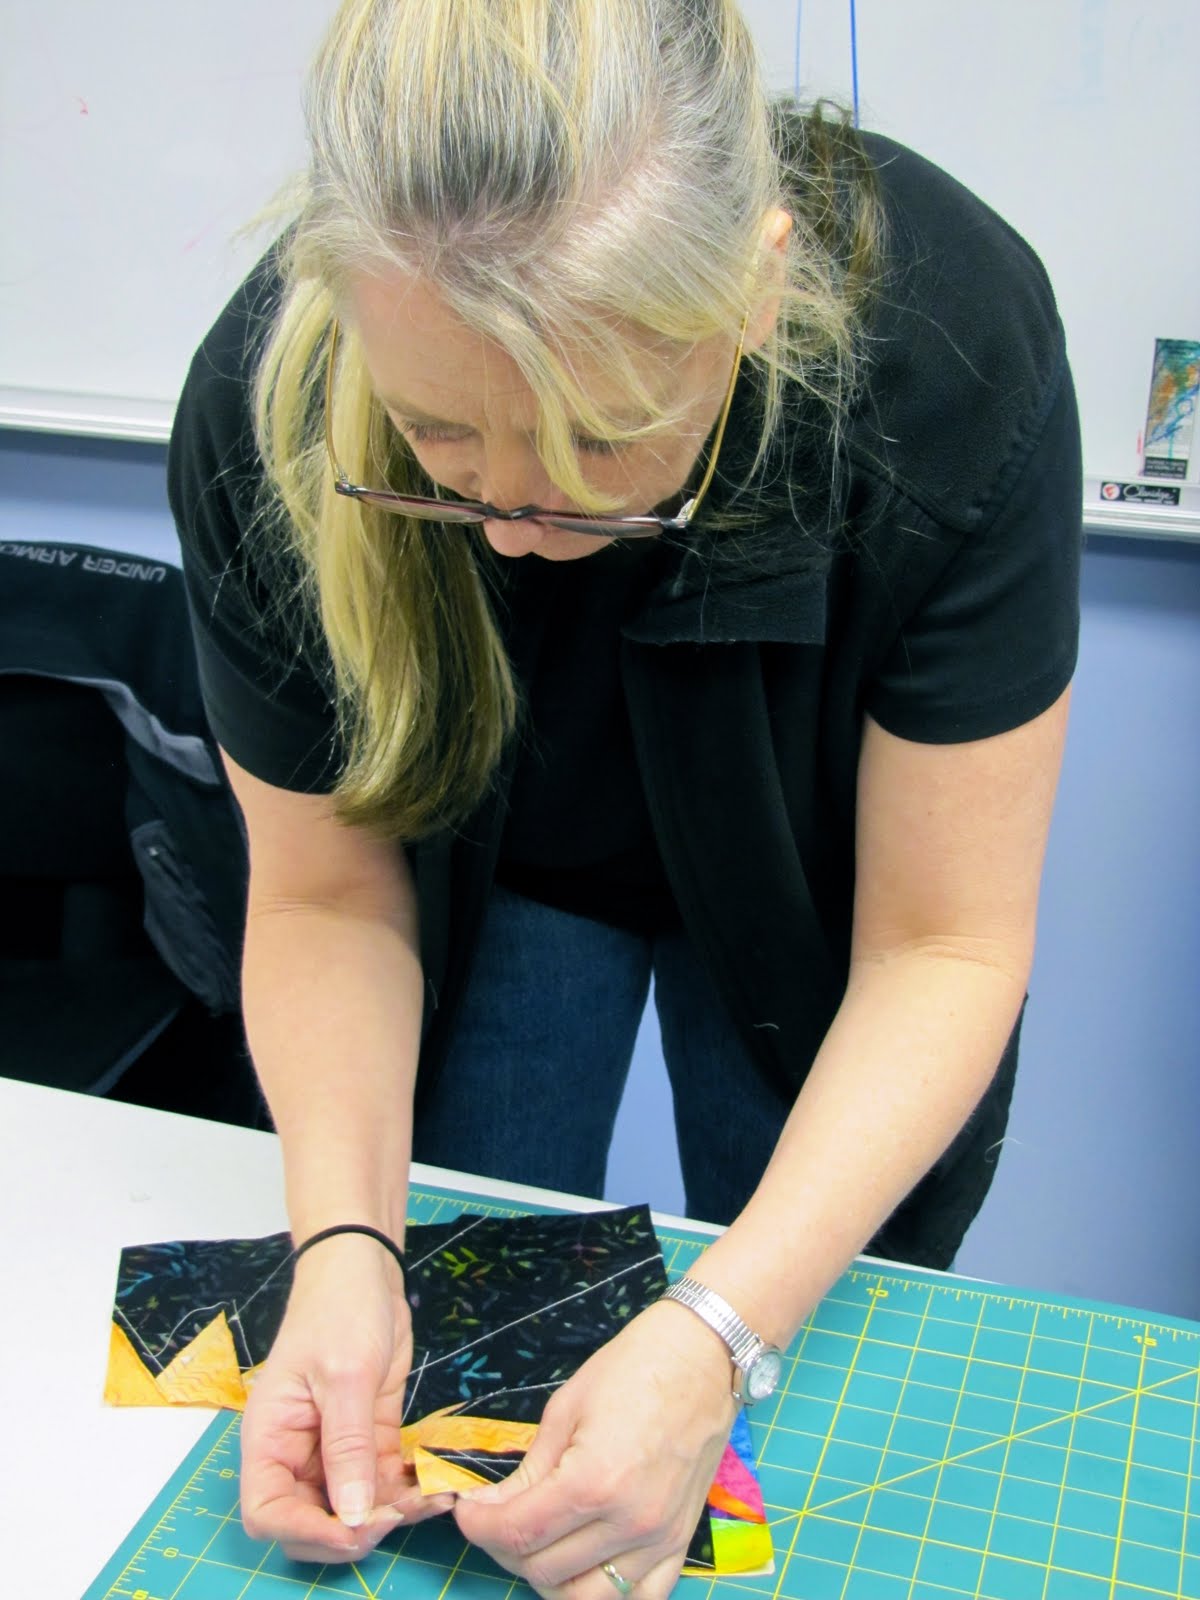
This is what it looks like during the piecing process. I just love the little pile of trimmings.


I used the Tucker Trimmer to get my combo units to the correct and precise size. It is a wonderful tool and can be found here.


Very little waste, but what I like best is the accuracy it gives you when the blocks are all trimmed up. This way your piecing should go together really easily and accurately.


These are just a few of the blocks, I really like them and can't wait start putting them on the design wall with the quilt. You can get an idea of what it will look like here. The pattern is called Hot Flash. I am hoping to have the quilt complete for her by the holidays. Wish me luck!!

Pssst... All batiks are marked down to $7.75 per yard through 12/3, in the shop. And I now stock black and white fabrics! (Shameless plug)

Until Next Time....

Share/Bookmark

Saturday, November 27, 2010

Color... Lots of It!! And Winners too!

Hello Everyone,

I hope you have all had a wonderful Thanksgiving and also survived Black Friday!! Speaking of Black Friday, check out the specials going on my home page of my shop! We had a fun day on Thanksgiving visiting family, but we are now home ready to get back into daily life. That is a good thing!

Recently, at my quilting retreat, we had the wonderful opportunity to visit a fabulous studio of art quilter Frances Holliday Alford. It is located in the quaint town of Grafton, VT and is well worth the stop. Her studio is called Embellishment Studios and very appropriately so. I wanted to just sleep there!!

She has been featured in Quilting Arts magazine and is quite the talent. I took tons of pictures, but was really taken with one piece that is in progress. So I chose to show you these.


Simply gorgeous! She had drawers and drawers filled with buttons and beads. All categorized by color. All fun too! This is still in progress.


Once you start getting closer to it you can distinguish the different beads and buttons that she has attached. Things like flowers, ladybugs, and ducks.


Hands too!


It is a very organized, kind of disorganized rainbow of color.


I just love the way the circles go from larger to smaller. I look forward to seeing this one complete.

Doesn't this piece make you want to get out all your buttons and beads and just begin playing? Now if this wasn't enough to make you drool, just take a look at this...


This is her fabric stash!! Well organized and gorgeous!

Now for the winners of the rulers from this post...

The winner of the Hunter's Star Ruler is:

Suzie from Little Busy Bee

The winner of the V Block Ruler is:


Thank you to all who entered the drawing!!

Until Next Time...


Share/Bookmark

Thursday, November 25, 2010

Happy Thanksgiving!

Hello Everyone,

Wishing you all the blessed Thanksgiving!


Until Next Time...


Share/Bookmark

Tuesday, November 23, 2010

Bright Spikes

Hello Everyone,

This past weekend, I had the opportunity to take another class with a favorite of mine, Judy Niemeyer. I have been lucky, in the past, to have also taken classes with her. A terrific teacher and pattern designer.

Anyway, this past weekend she was on this side of the country visiting my sister-in-law's guild in Kingston, NY. Luckily it is not too far of a drive for me, so of course, I went.

The Trunk show and Lecture were divine!! Tons of her gorgeous quilts. Then two classes. The photos in this one are of the Total Eclipse Pattern.


These are some of the spike blocks before trimming down. I chose 4 really dark background batiks and then very saturated brightly colored batiks for good contrast.


Here are some of the blocks are trimmed down and fitted with the quarter circle spikes. I was just playing here, this will not be the permanent layout.


Here Judy is showing her technique for setting in and sewing the curves.


Great technique, virtually no pinning.


The block above is my sister-in-law's block. She was making the Sunflower Illusions pattern. Both of the patterns use the same technique with a little variation.


Here Judy is showing her Total Eclipse. A beauty!! If you every have an opportunity to take a class with Judy do it. I have taken several and I am always learning something new.

I will hopefully be posting more progress on this soon, but with the holidays coming up we'll just have to see how far I get.

The giveaway results will be posted later this week. Don't forget about the Pre-cut sale going on in the shop. Use the code precut15 to get 15% off!


Until Next Time...

Share/Bookmark

Sunday, November 21, 2010

Tilted Four Patch

Hello Everyone,

Yes, another project that I was working on at my recent quilt retreat. Don't forget, I was almost gone for a week! Loved every minute too.

I am involved in an online swap with my quilting podcast buddies and we had to make 4 blocks of the Tilting Four Patch. The pattern came from The Quilter's Cache and is free and downloadable, just click here to get the pattern.

We could use any fabric of our choosing to send to our partner. Since I was prepping for a Judy Niemeyer Class (that I am taking today) with batiks, that is what I chose.

Here are the results...


I really like the results. I just hope my partner likes the blocks too.


I will be putting them in the mail tomorrow. The bright batiks really pop against the dark batik, don't they? It would be really neat to see some of you making the same block and seeing the fabrics that you would choose! Let me know if you do, I would love to see them

Don't forget to enter my giveaway on this blogpost, it ends tomorrow.

Also, don't forget all pre-cuts in the shop are on sale for 15% through Friday. Use the code precut15 at checkout. They make great stocking stuffers!

Until Next Time...

Share/Bookmark

Friday, November 19, 2010

And Then There Were Three....

Hello Everyone,

As you know, last week I was on a quilting retreat. Besides working on the Hunter's Star quilt, I worked on my Whirlygig blocks!! Very much fun and gratifying too.

I made three more centers and chose red, purple, and orange for the segments.


I do like how they turned out and because the color is so saturated it really looks great against the black and white fabric. I took tons of photos, but am saving those for the last part of the tutorial.


Many of you have said these would be great scrap blocks, and that is exactly what I have been doing, making the blocks from my scraps. Here is a shot of my scrap bin I took with me to the retreat. Believe me after the first day, it was really ALL over the floor just from the rummaging for that perfect scrap.


Here is a blowout shot of all the pieces in the orange whirlygig block. This one is called my "Ode to Justine Block". You may wonder, why? My friend Justine, who was also at the retreat and helps me in my shop, LOVES cows. She collects all kinds of cows, you name it she has it. Well, except for the live kind. But notice the black and white fabric in the bottom left corner, that is for her!! Love ya', Justine!


Here is the finished block. Ooops, not quite, still have to put the black and white circle in the middle. But I just love the orange one. Lots more to come with the tutorial, part 3. So stay tuned.

In other news...

1. Don't forget to enter my giveaway on this blog post.

2. And, guess what??? The black and white fabrics arrived for my shop!! I am so excited. I just have to load them onto the site. Hopefully, they will be in by Monday or over the weekend. So check back at the shop. There will be a new category just for black and whites!

3. Weekly Special: Beginning tomorrow 11/20, you can take 15% off all Pre-cuts in my shop by using the code precut15 at checkout. Yes, ALL Pre-cuts... that includes fat quarters, jelly rolls, charm packs etc. New batik bundles and the elusive Kona bundle too!! Click here to start shopping.

The sale and code will be good through 11/26!

Until Next Time..

Share/Bookmark

Wednesday, November 17, 2010

Big Giveaway!!

Hello Everyone,

As promised, I am doing a big giveaway today!! So if you would like to make one of these...


A Hunter's Star block. With one of these...


A Rapid Fire Hunter's Star Ruler. You may want to listen to this...


My Podcast Episode 19 with Deb Tucker!! She is the inventor of this wonderful ruler (and many others too!). We discuss how she became a quilter, and I pick her brain about her fabulous and extremely easy to use rulers and patterns. This is a must listen for your podcast list.

You can listen from you computer by clicking here, or you can get it free in the iTunes store by searching for Jackie's Quilting Chronicles. You can always go to my sidebar and click on the icon there as well.

So, the giveaway...


First up the Rapid Fire Hunter's Star ruler for the first prize. But if that wasn't good enough, Deb Tucker is also offering her BRAND NEW ruler that she introduced at Fall Quilt Market...


The V Block!! This makes those spikey and peaky blocks quite precisely. So, yes, there will be TWO winners!! Thank you, Deb for the great prizes!!

The rules:

1. Leave a comment on this blog post, make sure there is an e-mail where I can reach you if you win, for one entry.

2. Visit Deb's site and come back and tell me your favorite thing for a second entry.

3. Blog about the giveaway and let me know in a third comment for a third entry.

The giveaway will be open until Midnight, November 22, 2010.

Now, for those of you who just can't wait to have one of these rulers or patterns, please visit my shop! I stock Deb's wonderful products. You can find them by clicking here.

Best of luck in the drawing!!

***The giveaway is now closed, watch for the winner later this week!**


Until Next Time...


Share/Bookmark

Monday, November 15, 2010

Rapid Fire Hunter's Star

Hello Everyone,

First, I must apologize for my silence in replying to comments. I have been away on a wonderful quilting retreat for a week and tried hard to stay away from the computer. So please accept my apologies. This is not like me...

But I did have a wonderful time and was able to get tons accomplished!! I was pleased. This week is going to be a fun one on my blog because there will be a giveaway in relation to this post and Wednesday's post. So be sure to check back on Wednesday for the giveaway!!

Onto one of my big accomplishments at the retreat...


I bet many of you remember my previous posts on my black and white Hunter's Star quilt. You can find them by clicking here and here and here.

I began this quilt for my daughter as she has requested a black and white and teal quilt. I was able to get the body of this quilt complete at the retreat. I was very excited about this.


It was done with the wonderful tool... The Petite Rapid Fire Hunter's Star ruler! This ruler is the ONLY method, in my eyes, to create a Hunter's Star. No diamonds or trapezoids to cut. Really easy. You can find this ruler in my shop, here. And I do show some detail using it in my previous post here.

This ruler was created by my friend Deb Tucker of Studio 180 Designs. You will be able to listen to her on my Podcast on Wednesday when the podcast becomes available.


Anyway, I created this quilt with many, many different black and white fabrics from my stash. I really love the look of this and hope my daughter will too. But you might be asking yourselves, where oh where is the teal?

That will be in the border. It is going to be a pieced border using the Tucker Trimmer, another tool by Deb Tucker!!

But UH OH... What happened to my quilt??????


While I was piecing the blocks together, my good friend Justine snuck in a piece of Hunky Men Christmas fabric!!! I think she thought it either needed a little more color or possibly a little more intrigue.


Here they are close up, just in case you were wondering just how hunky they were!


As per our entire quilting retreat, here I am posing with my best Wilson (aka Anna) pose!

Stay tuned for Wednesday's BIG giveaway!!!

Until Next Time....

Share/Bookmark

Saturday, November 13, 2010

Looking Back

Hello Everyone,

With winter fast approaching and having had our first snowfall on Monday, I have been thinking of the summer. So I wanted to share a great day that we had in August.

My hubs and I had taken a trip to see Victoria and her family in August. They took us on a wonderful outing to Montauk Point Lighthouse.


A beautiful day was had by all. This lighthouse is at the very eastern tip of Long Island. What a gorgeous place.


Here is Victoria with me. I look like I was telling my hubs how to use the camera. He didn't do a bad job though.


I just love the sound and sight of the wave hitting the beach. These were some beautiful rocks too.


A gorgeous site, makes me long for the summer. Can you tell I am not a winter girl?

I hope you enjoyed this brief interlude from the regular quilty posts.

Until Next Time...

Share/Bookmark

Thursday, November 11, 2010

Whirlygig Tutorial... Part 2

Hello Everyone,

Welcome to Part 2 of the Whirlygig Tutorial. Sources for the tools used will be at the end of the post. This part is all about paper piecing, one of my favorite ways to quilt! This is mostly because of it's accuracy and precision. So, let's begin...


First you must have your arcs all printed and trimmed to about 1/4" from the edges. Each whirlygig circle requires 4 arcs. Also have ready either a piece of template plastic or postcard, (something rigid) and a glue stick. Locate #1 on the paper foundation, then flip the foundation over...


...and swipe the #1 spot with the glue stick. This will keep the first piece of fabric in place.


Attach the first piece of fabric, right side up, to where you applied the glue. It is important to make sure the fabric covers the entire #1 area and the seam allowances. You can check this by turning it over and holding it up to the light.


You can see it better here in this photo. Now take your piece of template plastic and place it on the solid line. Hold template plastic in place and fold back the paper foundation.


This is what it will look like folded back.


Then take your add a quarter ruler and butt the lip of the ruler against the rigid plastic. You will see excess fabric extended beyond the ruler.


Take your rotary cutter and trim away the excess. This will leave an exact quarter inch of fabric left to sew the seam allowance.


Now flip the foundation back over so the fabric is facing up, add your next piece of fabric, matching the cut edge of the #1 piece with the edge of the next piece as pictured above. Fabrics are right sides together. It is critical that you make sure the #2 piece of fabric will cover the #2 area on the foundation prior to sewing.


Now time to sew. You will need to decrease your stitch length on your machine to about 1.5. This will allow for you to pull the paper away without pulling the stitches out. Stitch on the solid black line.


Turn the foundation over and press the #2 piece back for a very crisp seam. Then you will repeat the "flipping and sewing" technique as you just did until you have filled up the foundation sheet.


You can see what it is starting to look like.


Here is the whole arc completely sewn before trimming down. Now turn it over to see the line on which you should trim the excess fabric away. If you are confident, you may trim with a rotary cutter. If not, carefully trim with a scissors.


This is what you will have once trimmed. A beautiful spikey arc!


Continue to repeat the process making 3 more arcs to fit around the whirlygig circle.

The third installment will show you how to attach the arcs. This most likely will come next week. I am currently on a quilting retreat taking the remainder of the photos!

Tools and sources:

For this project, I used Fons and Porter Glue Marker. However, if you don't have this you can use UHU glue stick as it is washable. Be sure to check your glue stick to assure it is NOT permanent.

Add A Quarter ruler can be found here.

Quilts With A Spin by Becky Goldsmith and Linda Jenkins for the paper foundation arcs.

I hope you are enjoying this so far!!

Until Next Time...

Share/Bookmark
Related Posts Plugin for WordPress, Blogger...